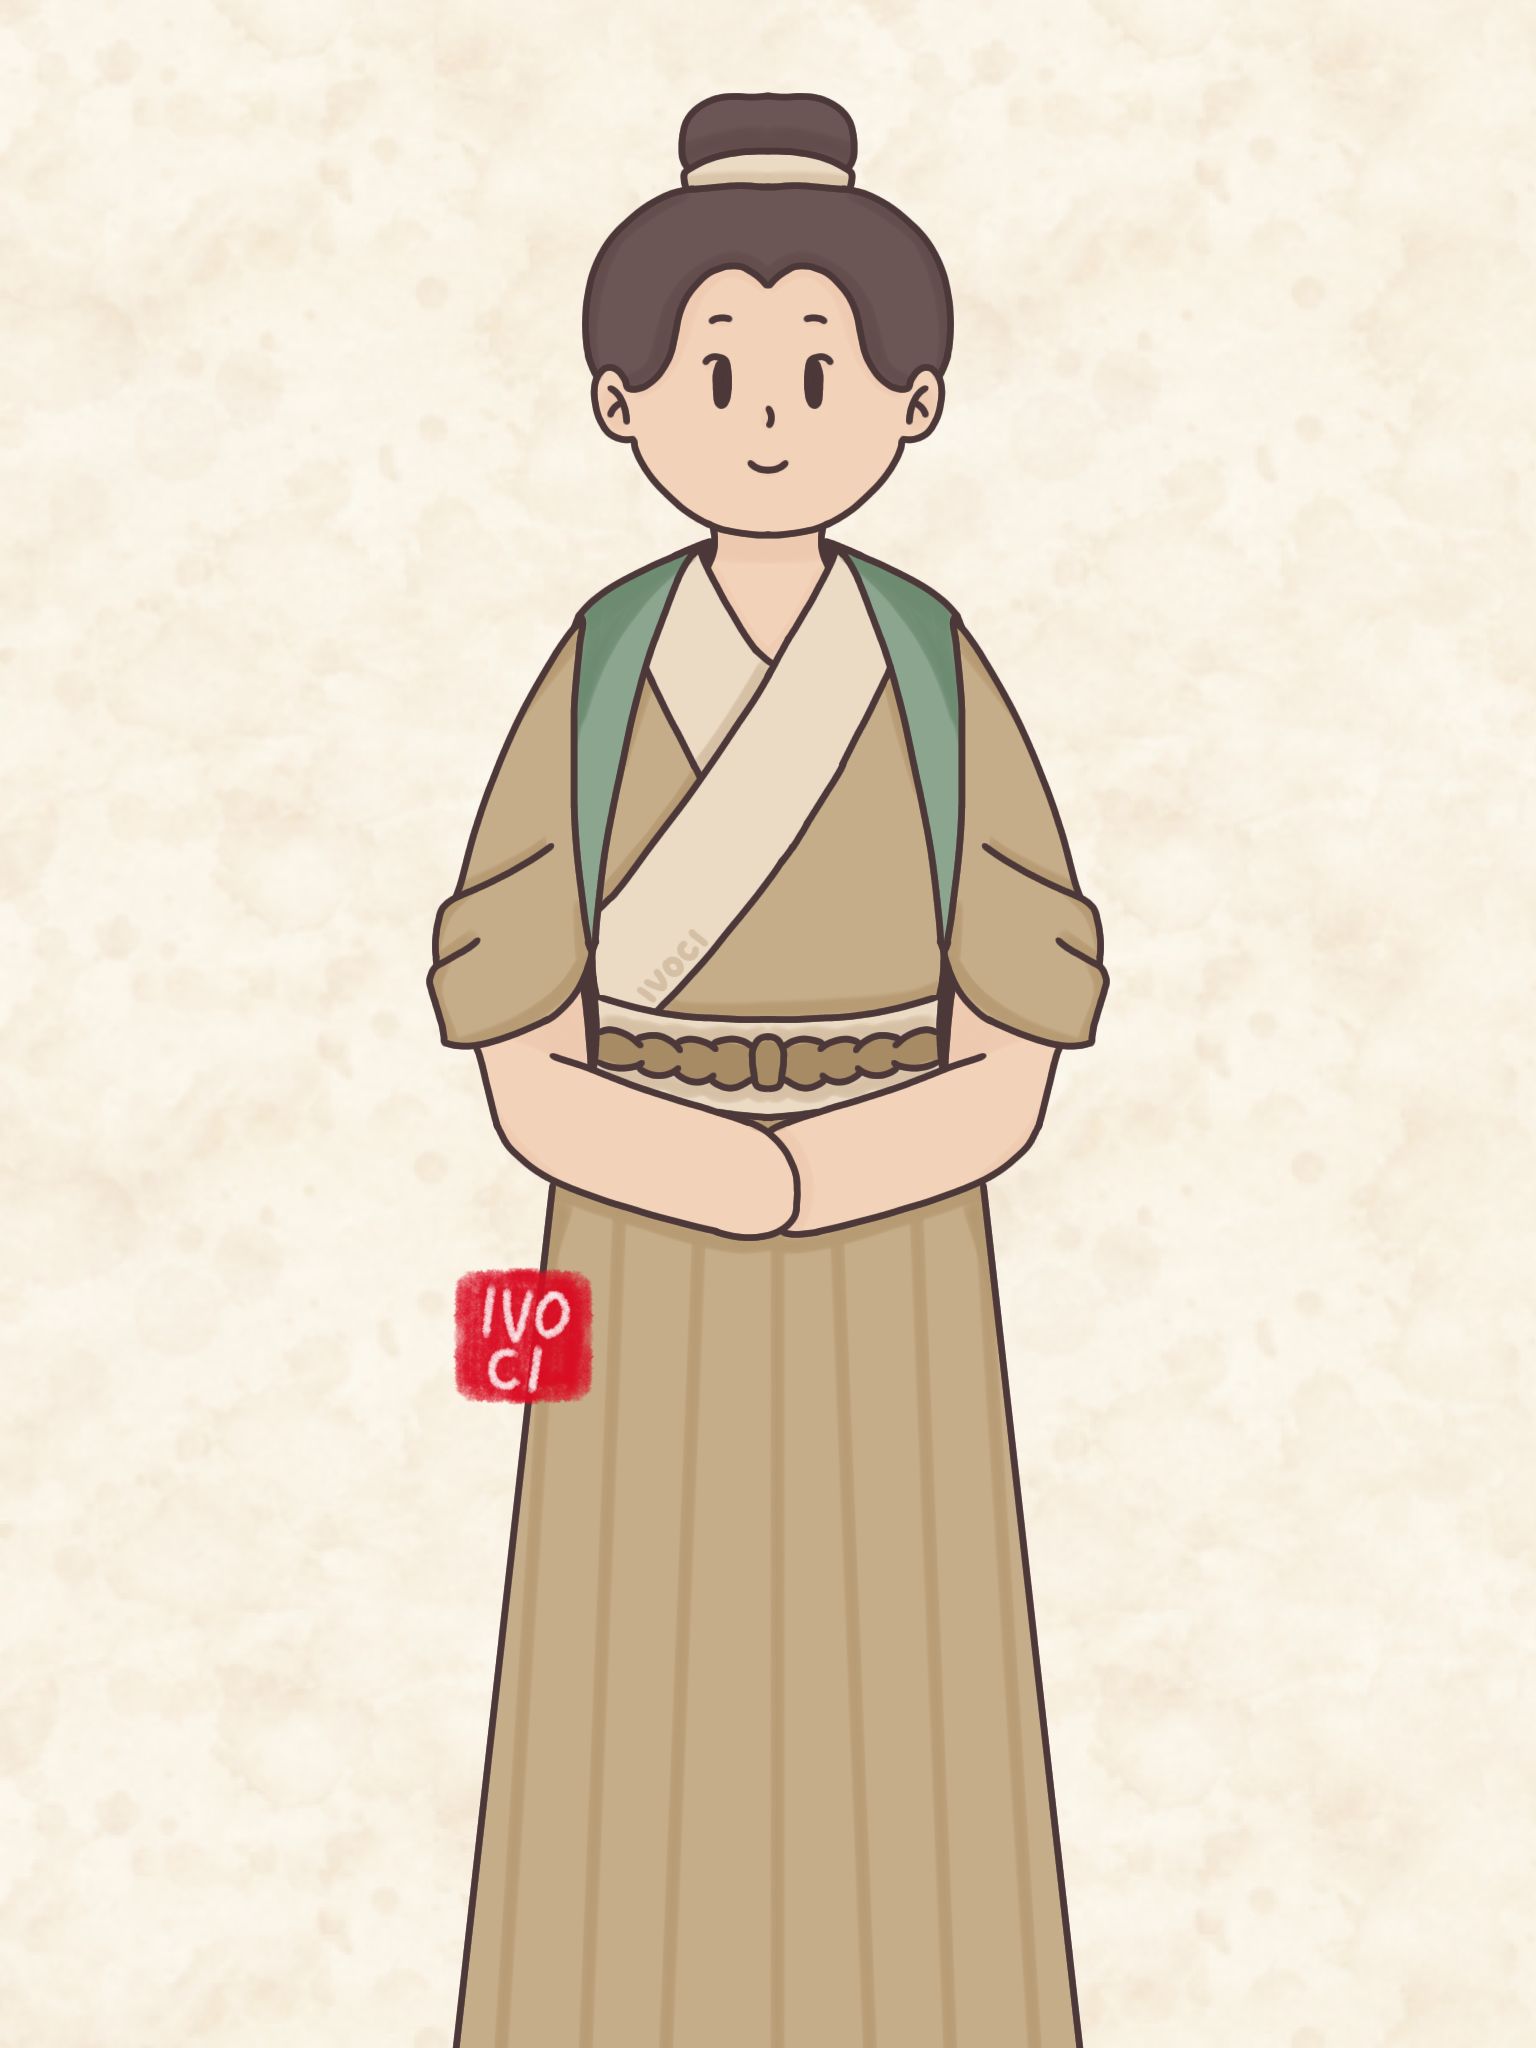
Panbo (襻膊 ; pàn bó) / (攀膊 ; pān bó) is a long piece of cloth tied over the sleeves for convenience in work.
Bisheng (臂绳 ; bì shéng) translates directly to “arm rope”. Bisheng is another way to call Panbo.
Fubo (缚膊 ; fù bó) directly translates to “bound”. Fubo is another way to call Panbo.
History of Panbo
According to Shen Congwen (沈從文) “Research on Ancient Chinese Clothing (中国古代服饰研究)”, Panbo is a type of clothing invented in the Song dynasty by workers for convenience. The function of the Panbo is to secure the long arms so they don’t get in the way of jobs like farming, cooking, and washing.
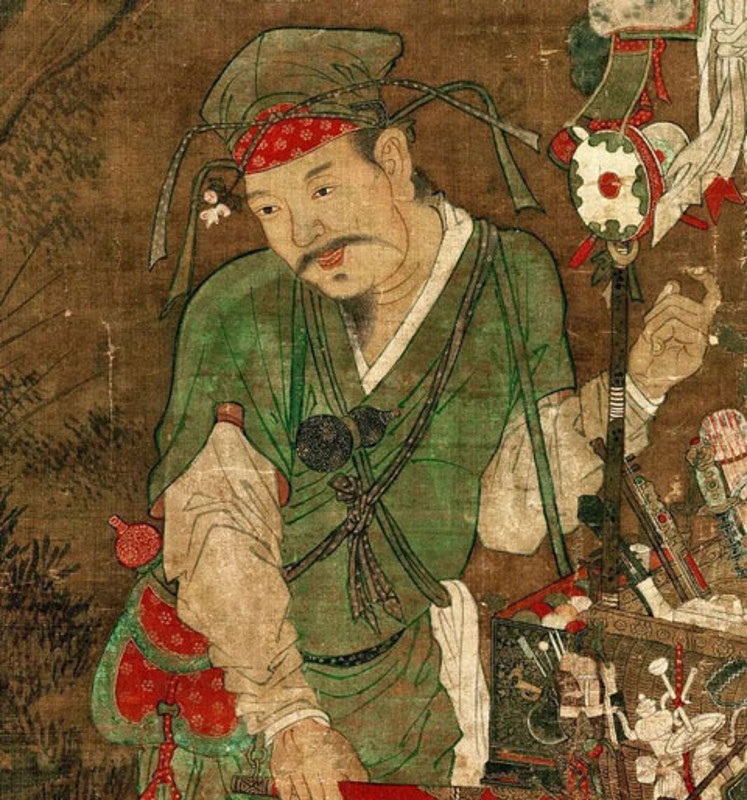
Shen Congwen wrote “宋 人记厨娘事,就提及当时见过大场面的厨娘,用银索襻膊进行烹调。可知它是 宋 代劳动人民为便于操作而发明的通用工具。特种的才 用银练索,一般大致不外丝麻作成。”
Roughly translated as The people of Song remember the experiences of cooks using silver rope as Panbo when cooking. You could say it was a tool invented by Song dynasty workers to make work easier. A special kind of Panbo would be made of silver rope, the general style would be made of silk and coarse linen.”
Little information goes into the history of Panbo other than saying that it was created during the Song dynasty to provide comfort. Perhaps some dynasties after the Song also integrated this into their clothing when needed. Even now, people interested in Hanfu culture might still use Panbo when their long Hanfu arms get in the way.
However, in contrast to the past, today’s Hanfu is seen more as an interest in ancient Chinese culture. People rarely wear Hanfu especially long sleeves, 24/7 or every day. So even though Panbo’s are still around today, it’s rare for anyone to use them because the short sleeves are so much more comfortable and easy to use.

As for Panbo’s tying technique, it can only base on the art that has been excavated. There may be more than one binding method, or there may be only one. Even if there should have been one original method, people today have progressed from that one too many more.
Also, there were no strict rules like Hanfu for Panbo that differentiated between nobles and commoners, or what type of clothing one should wear in certain situations. It is simply a tool mostly used by working people who need to earn by moving around a lot and getting a lot of work done every day.
While there are different tying techniques, they all serve one purpose which is to secure the sleeve while working.
How Panbo Looks
Panbo Material
Panbo is just a long piece of cloth that can be used to tie long sleeves, so any piece of cloth can serve that purpose.
But the Chinese have distinguished between Panbo and the useless long cloth, meaning that there are people who deliberately sew and make Panbo for necessities. And Panbo is usually made from materials such as cotton linen, a material that has a soft and somewhat elastic texture. It can also be a long strap, such as a Hanfu belt.
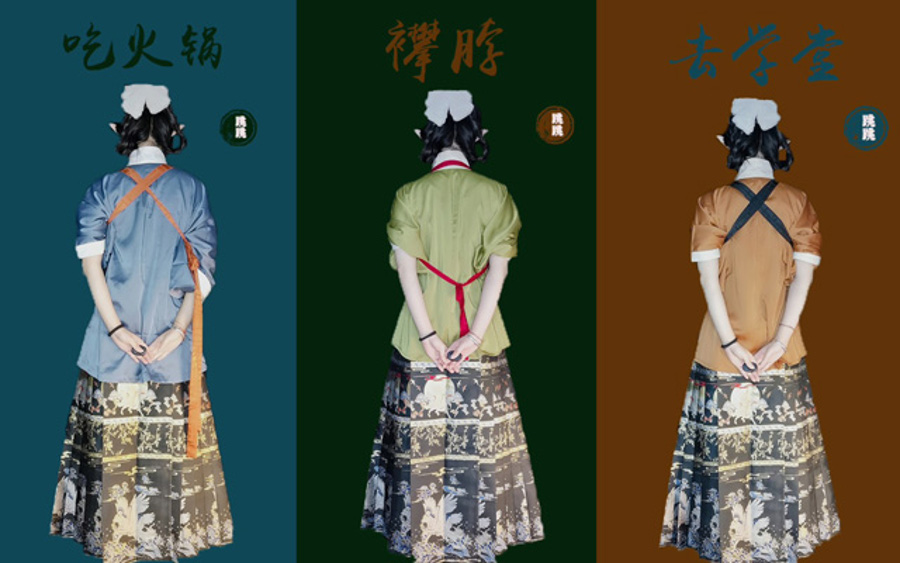
For the design, Panbo usually only has one plain color. But nowadays, besides plain cloth, some add a little embroidery to it.
Panbo Use
Panbo is usually about 3 meters long.
A loose hole will be made at both ends of the Panbo. The hole will leave enough room to tuck the sleeves on either side along with room for the sleeves.
The middle part of the Panbo will be looped over both shoulders back and draped behind the neck. It will act as a hook to keep the ends of the sash and sleeves from falling off while doing the job.
Panbo Tying Tutorial
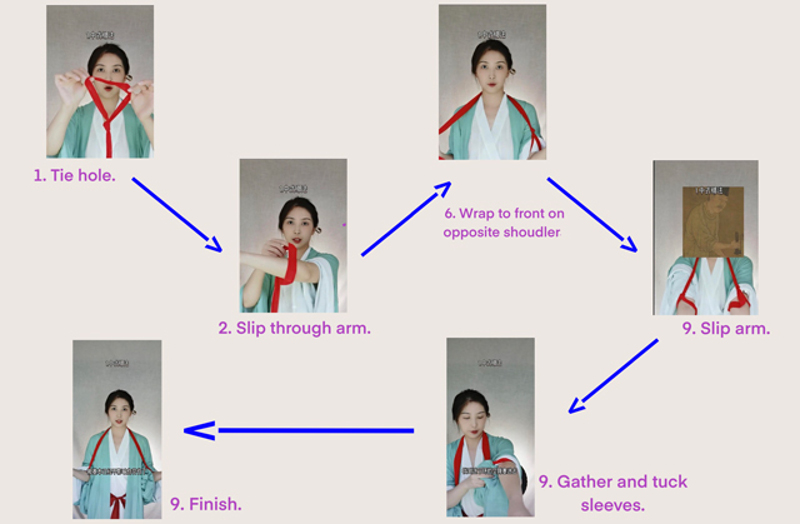
Source: Newhanfu & 雪梨粥
1. On the end of the cloth, thread a small hole with enough space for the arms and sleeves.
2. Slip in one of the arms (left).
3. Gather the left arm and tuck it into the remaining space (Optional: you can leave the sleeve hanging if it doesn’t interfere with doing the work as the long sleeve will be secured on the upper arm and can’t slide down with the sash holding it up.)
4. The remaining sash should now be in the front, you will then loop the remaining portion over the left shoulder to the back.
5. Make sure the left side of the arm that you already finished dealing with can hang down to the side of your body naturally instead of raised in midair. That length from the loop to over your shoulder will be enough space to be comfortable as you work on the other side.
6. Then move the sash to the right side. This will have the sash appearing at the back over one shoulder, move past the back of the neck to the opposite shoulder, and appear back to the front.
7. Move the sash over the shoulder to the front.
8. Then tied out another hole on the other end of the sash.
9. Slip your arm in and gather the sleeves on the right and tuck them into the remaining space.
Leave a Reply